Implementing Biometric Authentication in Java Android
May 15, 2021 by Atul Sharma


Thinking of adding your own app lock to your android app?
Adding a biometric app lock 🔒 to protect your user from unauthorized usage, protect their data and information can be really helpful.
Biometric authentication allows you to quickly unlock your device with your fingerprint or face, confirming it’s really you who’s using the app.
Android’s biometric APIs allow for secure authentication on the Android platform. They manage a system-provided biometric authentication prompt, and provide a seamless experience by supporting various authentication types, including biometric ones such as fingerprint and face, as well as non-biometric types like PIN, password, and pattern.
Flow of Biometric authentication :

To use the Biometric API in your app, do the following step by step process :
1. Add the Gradle dependency to your app module
Check here for the latest release of the library.
implementation "androidx.biometric:biometric:1.1.0"
2. Declare the types of authentication that your app supports
To define the types of authentication that your app supports, use the [BiometricManager.Authenticators] interface. The system allows you to declare the following types of authentication:
[BIOMETRIC_STRONG]Authentication allows fingerprint sensor only.[BIOMETRIC_WEAK]Authentication allows all biometrics i.e. fingerprint, face and iris.[DEVICE_CREDENTIAL]Authentication using a screen lock credential – the user’s PIN, pattern, or password.
In order to enroll an authenticator, the user needs to create a PIN, pattern, or password. If the user doesn’t already have one, the biometric enrollment flow prompts them to create one.
3. Check whether the device supports biometric authentication
BiometricManager biometricManager = BiometricManager.from(this);
        switch (biometricManager.canAuthenticate(BiometricManager.Authenticators.BIOMETRIC_WEAK | BiometricManager.Authenticators.DEVICE_CREDENTIAL)) {
            case BiometricManager.BIOMETRIC_SUCCESS:
                Log.d("MY_APP_TAG", "App can authenticate using biometrics.");
                                break;
            case BiometricManager.BIOMETRIC_ERROR_NO_HARDWARE:
                Log.e("MY_APP_TAG", "No biometric features available on this device.");
                // You can disable the buttons to use biometric
                break;
            case BiometricManager.BIOMETRIC_ERROR_HW_UNAVAILABLE:
                Log.e("MY_APP_TAG", "Biometric features are currently unavailable.");
                // You can disable the buttons to use biometric
                break;
            case BiometricManager.BIOMETRIC_ERROR_NONE_ENROLLED:
                // Prompts the user to create credentials that your app accepts.
                final Intent enrollIntent = new Intent(Settings.ACTION_BIOMETRIC_ENROLL);
                enrollIntent.putExtra(Settings.EXTRA_BIOMETRIC_AUTHENTICATORS_ALLOWED,BiometricManager.Authenticators.BIOMETRIC_WEAK | BiometricManager.Authenticators.DEVICE_CREDENTIAL);
                startActivityForResult(enrollIntent, IntentIntegrator.REQUEST_CODE);
                break;
        }
4. Create an instance of BiometricPrompt
The BiometricPrompt constructor requires both an Executor and an AuthenticationCallback object. The Executor allows you to specify a thread on which your callbacks should be run.
The AuthenticationCallback has three methods:
onAuthenticationSucceeded()is called when the user has been authenticated using a credential that the device recognizes.onAuthenticationError()is called when an unrecoverable error occurs.onAuthenticationFailed()is called when the user is rejected, for example when a non-enrolled fingerprint is placed on the sensor, but unlike withonAuthenticationError(), the user can continue trying to authenticate.
Executor executor = ContextCompat.getMainExecutor(this);
BiometricPrompt biometricPrompt = new BiometricPrompt(this, executor, new BiometricPrompt.AuthenticationCallback() {
        @Override
        public void onAuthenticationError(int errorCode, @NonNull CharSequence errString) {
            // if you pressed back button or some error occured you will get result here
                        super.onAuthenticationError(errorCode, errString)
        }

        @Override
        public void onAuthenticationSucceeded(@NonNull BiometricPrompt.AuthenticationResult result) {
            // Do whatever you wish to do after successful authentication
            super.onAuthenticationSucceeded(result);
        }

        @Override
        public void onAuthenticationFailed() {
                        // on failed authentication of biometric you will find result here
            super.onAuthenticationFailed();
        }
        });
Instantiating the BiometricPrompt should be done early in the lifecycle of your activity (e.g., in onCreate ). This ensures that the current instance will always properly receive authentication callbacks.
5. Build a PromptInfo object
Once you have a BiometricPrompt object, you ask the user to authenticate by calling biometricPrompt.authenticate(promptInfo).
This call will show the user the appropriate UI, based on the type of biometric credential being used for authentication – such as fingerprint, face, or iris. As a developer you don’t need to know which type of credential is being used for authentication; the API handles all of that for you.
BiometricPrompt.PromptInfo promptInfo = new BiometricPrompt.PromptInfo.Builder()
                .setTitle("Biometric Demo")
                .setSubtitle("Authorization Required")
                .setDescription("It prevents app from unauthorized data access.")
                .setAllowedAuthenticators(BiometricManager.Authenticators.BIOMETRIC_WEAK | BiometricManager.Authenticators.DEVICE_CREDENTIAL)
                .setConfirmationRequired(false)
                .build();
Caution before setting setConfirmationRequired to false, By default, the system requires users to perform a specific action, such as pressing a button, after their biometric credentials are accepted. This configuration is preferable if your app is showing the dialog to confirm a sensitive or high-risk action, such as making a purchase.
6. Ask the user to authenticate
Now that you have all the required pieces, you can ask the user to authenticate. Just call this single line to use biometric authentication whenever required.
biometricPrompt.authenticate(promptInfo);
And that’s it! 😀 You should now be able to perform authentication, using biometric credentials, on any device that runs Android 6.0 (API level 23) or higher.
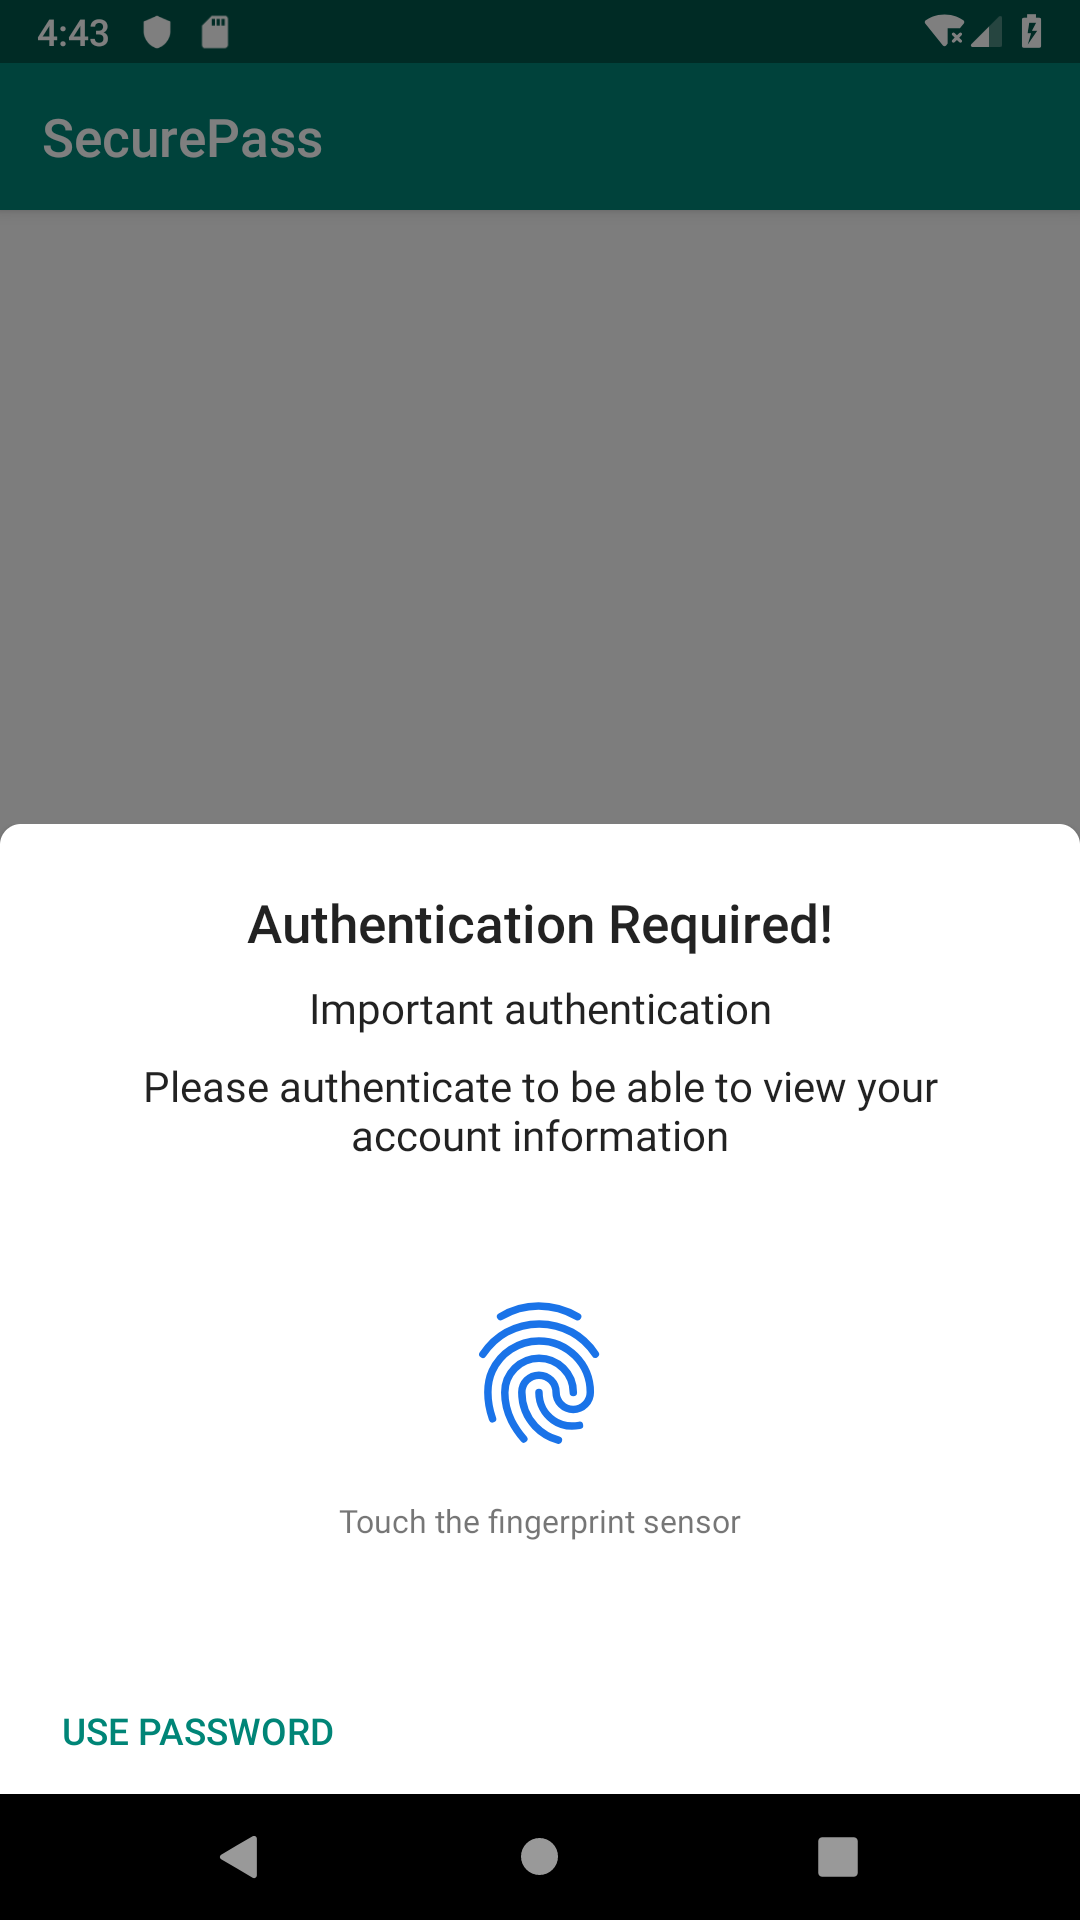
Your app should show something like this:

Check out the entire code here.
Hope it helped. Happy Coding 😀
